How to Install a Bottom Screw in Tap
Author: Eliza Douglas Date Posted:13 July 2021
Here are a few tips and tricks on how we install our bottom screw in tap!
If you having trouble follow the steps below.
Tools we use:
- Drum Spanner
- Knife
- Flathead Screwdriver
- Bottom screw in tap
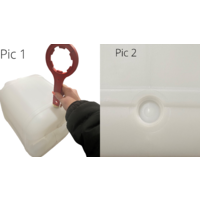
To start the process, we turn our drum so the bottom bung is facing up this, is very important so no liquid is spilt in this process. Once the bottom bung is facing up we use the end of our drum spanner to twist it open once it is open you will see there is plastic behind it, this is so it doesn’t leak in transportation. (refer to pic 1)
Once the bottom bung has been removed, we use our knife and start but cutting a square, in the drum as the middle is the hardest part to cut we recommend, cutting a square. (refer to pic 2)
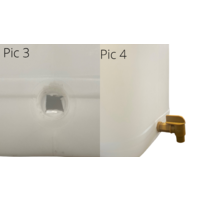
After you have cut through most of the way we suggest getting the flathead screwdriver to push, once 3 sides open, once there is one side cut but not all the way you can then push it toward the inside, of the drum. (refer to pic 3)
After there is a hole in the drum, you will be able to install the drum tap. (refer to pic 4)
We hope this helps! make sure you leave a product review
Need more Help? Have a look at our youtube video
https://www.youtube.com/watch?v=8E-gi0rGlNU
Check out of bottom screw in taps: https://www.sydneysolvents.com.au/gold-screw-in-20-litre-taps
Check out our drum tap in lid: https://www.sydneysolvents.com.au/58mm-closure-with-tap
Comments (1)
So HelP!!
By: Alan on 14 July 2021I was having trouble installing the tap but this was very helpful!!
